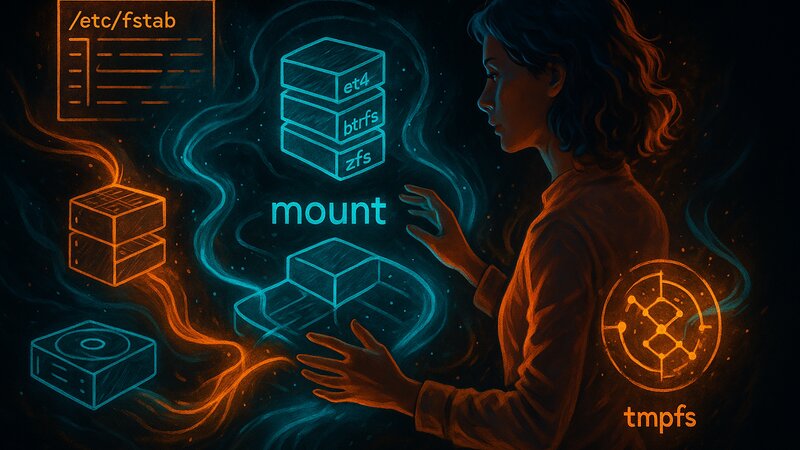
Unix organizes all files into a single directory tree. Additional storage devices—USB drives, hard disk partitions, network shares—are attached to this tree by mounting them. A mount point is a directory that serves as the attachment point. After mounting, the files on the storage device appear under that directory.
Mounting separates the logical structure (the directory tree) from the physical storage (partitions and devices). /home can reside on a separate partition, /tmp in the tmpfs RAM filesystem, /mnt/backup on a network share—for the user, everything appears as one continuous tree.
Understanding the Mount Concept
Mounting and Unmounting
The mount command connects a filesystem to a directory:
$ sudo mount /dev/sdb1 /mnt
This mounts the first partition of the second drive (/dev/sdb1) at /mnt. All files on that partition appear under /mnt. The /mnt directory must already exist before mounting—empty directories serve as mount points.
$ ls /mnt
documents  pictures  music
The files are now accessible. Changes made under /mnt are written to the mounted partition. The original /mnt directory is hidden while the filesystem is mounted—the original contents become visible again only after umount.
$ sudo umount /mnt
The umount command (without an “n”) disconnects the filesystem. The files are no longer visible under /mnt. Important: Before unmounting, all files must be closed—open files or running programs block the operation with a “device is busy” error.
Displaying Current Mounts
$ mount
/dev/sda1 on / type ext4 (rw,relatime)
/dev/sda2 on /home type ext4 (rw,relatime)
tmpfs on /tmp type tmpfs (rw,nosuid,nodev)
/dev/sdb1 on /mnt/backup type ext4 (ro,relatime)
The mount command without parameters displays all active mounts. Each line lists the device, mount point, filesystem type, and mount options. The rw option means read-write, ro means read-only, and relatime optimizes access timestamp updates.
$ df -h
Filesystem      Size  Used Avail Use% Mounted on
/dev/sda1        50G   12G   36G  25% /
/dev/sda2       200G   89G  101G  47% /home
tmpfs           7.8G  156M  7.7G   2% /tmp
/dev/sdb1       1.0T  234G  766G  24% /mnt/backup
The df command (disk free) displays storage usage for each filesystem. The -h (human-readable) option uses GB/TB instead of bytes. Every mounted filesystem has its own storage statistics—/ and /home are separate, and a full /home partition does not prevent the root filesystem from functioning.
Mount Options
Mount options control the behavior of a mounted filesystem:
$ sudo mount -o ro,noexec /dev/sdb1 /mnt
The ro (read-only) option prevents write operations. noexec prohibits running programs from that filesystem. This is useful for external storage devices—it protects against accidental modifications and malware execution.
Common mount options:
| Option | Meaning |
|---|---|
rw |
Read-write (default) |
ro |
Read-only, no write operations |
noexec |
No executable programs |
nosuid |
Ignore SetUID bits |
nodev |
Ignore device files |
relatime |
Update access timestamps sparingly |
sync |
Synchronous writes (slower, safer) |
async |
Asynchronous writes (faster, default) |
The nosuid and nodev options improve security on external storage devices. A USB drive should not execute SetUID programs or provide device files—both represent potential security risks.
Automatic Mounting with /etc/fstab
The fstab File
The /etc/fstab (filesystem table) file defines filesystems that are mounted automatically during boot. Each line describes one filesystem using six fields:
$ cat /etc/fstab
# <device>     <mount-point>  <type>  <options>        <dump> <pass>
/dev/sda1      /              ext4    defaults         0      1
/dev/sda2      /home          ext4    defaults         0      2
tmpfs          /tmp           tmpfs   defaults,nosuid  0      0
/dev/sdb1      /mnt/backup    ext4    ro,noauto        0      0
The fields mean:
- Device: Device file, UUID, or label
- Mount Point: Directory used as the mount point
- Type: Filesystem type (ext4, tmpfs, nfs, etc.)
- Options: Mount options (
ro,rw,noexec, etc.) - Dump: Backup with
dump(0=no, 1=yes, usually 0) - Pass:
fsckorder during boot (0=skip, 1=root, 2=others)
The system reads /etc/fstab during boot and mounts all entries automatically. The noauto option skips automatic mounting, which is useful for external storage devices that should be mounted manually.
UUIDs Instead of Device Names
Device names such as /dev/sdb1 can change—a USB drive may appear as /dev/sdb1 one time and /dev/sdc1 the next. UUIDs (Universally Unique Identifiers) are stable and unique:
$ sudo blkid
/dev/sda1: UUID="a1b2c3d4-e5f6-1234-5678-9abcdef01234" TYPE="ext4"
/dev/sda2: UUID="b2c3d4e5-f6a1-2345-6789-abcdef012345" TYPE="ext4"
/dev/sdb1: UUID="c3d4e5f6-a1b2-3456-789a-bcdef0123456" TYPE="ext4"
The blkid command displays the UUIDs of all partitions. The UUID a1b2c3d4-e5f6-1234-5678-9abcdef01234 uniquely identifies one partition, regardless of its device name.
$ cat /etc/fstab
UUID=a1b2c3d4-e5f6-1234-5678-9abcdef01234  /      ext4  defaults  0  1
UUID=b2c3d4e5-f6a1-2345-6789-abcdef012345  /home  ext4  defaults  0  2
The fstab file uses UUIDs instead of /dev/sda1. Hardware changes (an additional hard drive or USB boot) do not affect the mounts because UUIDs remain constant.
Labels as an Alternative
Filesystem labels provide human-readable names for partitions:
$ sudo e2label /dev/sda2
home

$ sudo e2label /dev/sda2 "System-Home"
The e2label command reads and sets labels for ext2/ext3/ext4 filesystems. Other filesystems provide their own tools: btrfs filesystem label, xfs_admin -L for XFS.
$ cat /etc/fstab
LABEL=system-root  /      ext4  defaults  0  1
LABEL=system-home  /home  ext4  defaults  0  2
Labels are easier to read than UUIDs, but they are less robust—duplicate labels lead to mounting conflicts. UUIDs are safer, while labels are more convenient for administration.
Mount Options in fstab
The defaults option in fstab expands to several standard options: rw,suid,dev,exec,auto,nouser,async. Specific requirements override individual settings:
/dev/sdb1 /mnt/backup ext4 ro,noauto,noexec 0 0
This configures the filesystem as read-only (ro), disables automatic mounting during boot (noauto), and prevents executable programs (noexec). The administrator must manually run sudo mount /mnt/backup—fstab only defines the parameters.
tmpfs /tmp tmpfs defaults,nosuid,nodev,size=4G 0 0
This tmpfs entry for /tmp limits its size to 4 GB (size=4G) while preventing SetUID programs (nosuid) and device files (nodev). This protects against excessive RAM consumption and security risks.
RAM-Based Filesystems
Understanding tmpfs
tmpfs (temporary filesystem) stores files in RAM. Write operations are extremely fast, and read operations are equally fast. The disadvantage is that all data is lost after a reboot. tmpfs is suitable for temporary files and caches.
$ mount | grep tmpfs
tmpfs on /tmp type tmpfs (rw,nosuid,nodev,size=4G)
tmpfs on /run type tmpfs (rw,nosuid,nodev,noexec,size=1G)
tmpfs on /dev/shm type tmpfs (rw,nosuid,nodev)
Modern systems use tmpfs for several directories:
/tmpfor temporary files created by all programs/runfor runtime data (PID files, sockets)/dev/shmfor shared memory between processes
The /run tmpfs uses noexec, preventing executable programs. This is appropriate because /run stores only runtime data, not binaries.
Limiting the Size of tmpfs
$ sudo mount -t tmpfs -o size=2G tmpfs /mnt/ramdisk
$ df -h /mnt/ramdisk
Filesystem      Size  Used Avail Use% Mounted on
tmpfs           2.0G     0  2.0G   0% /mnt/ramdisk
This creates a 2 GB tmpfs at /mnt/ramdisk. The size is dynamic—tmpfs consumes only the RAM actually in use. An empty 2 GB tmpfs uses 0 bytes of RAM. Once the configured size limit is reached, df reports 100% usage, and additional write operations fail with “No space left on device.”
When tmpfs Makes Sense
Suitable for:
/tmp— temporary build artifacts, downloads- Cache directories (browsers, compilers)
- Fast temporary data processing
- Shared memory between processes
Not suitable for:
- Important data (lost after a crash)
- Large amounts of data (RAM is limited)
- Long-lived temporary files
Systems with large amounts of RAM (32 GB or more) benefit from using tmpfs for /tmp. Systems with little RAM (less than 4 GB) should keep /tmp on disk, as tmpfs may cause memory shortages.
Persistent Filesystems
ext4 — The Standard Filesystem
ext4 (Fourth Extended Filesystem) is the standard filesystem on Linux. It is mature, stable, and performant. ext4 uses journaling—interrupted write operations after a crash are repaired during the next boot.
$ sudo mkfs.ext4 /dev/sdb1
mke2fs 1.47.0 (5-Feb-2023)
Creating filesystem with 262144 4k blocks and 65536 inodes
Filesystem UUID: c3d4e5f6-a1b2-3456-789a-bcdef0123456
Superblock backups stored on blocks:
        32768, 98304, 163840, 229376

Allocating group tables: done
Writing inode tables: done
Creating journal (8192 blocks): done
Writing superblocks and filesystem accounting information: done
The mkfs.ext4 command creates an ext4 filesystem on /dev/sdb1. The block size is 4 KB (the default), and the journal occupies 8,192 blocks (32 MB). When complete, the filesystem is empty and ready to be mounted.
ext4 characteristics:
- Maximum file size: 16 TB
- Maximum filesystem size: 1 EB (exabyte)
- Journaling for crash protection
- Extent-based allocation (less fragmentation)
- Online defragmentation available
btrfs — A Copy-on-Write Filesystem
btrfs (B-tree Filesystem) uses Copy-on-Write (CoW)—changes are written to new blocks instead of overwriting existing ones. This makes snapshots possible without requiring additional storage for unchanged data.
$ sudo mkfs.btrfs /dev/sdb1
btrfs-progs v6.3.1
See http://btrfs.wiki.kernel.org for more information.

Label:              (none)
UUID:               d4e5f6a1-b2c3-4567-89ab-cdef01234567
Node size:          16384
Sector size:        4096
Filesystem size:    1.00TiB
btrfs features:
- Snapshots without copying files
- Built-in RAID functionality (no
mdadmrequired) - Transparent compression (
zlib,lzo,zstd) - Online resizing (grow and shrink)
- Checksums for data integrity
$ sudo mount /dev/sdb1 /mnt
$ sudo btrfs subvolume create /mnt/data
$ sudo btrfs subvolume snapshot /mnt/data /mnt/data-snapshot
Btrfs subvolumes are isolated namespaces within a filesystem. Snapshots are instantaneous, space-efficient copies—only modified data consumes additional storage. This makes them ideal for backups and system rollbacks.
ZFS — An Enterprise Filesystem
ZFS combines a filesystem with a volume manager. It provides maximum data integrity through end-to-end checksums and automatic repair on RAID systems.
$ sudo zpool create tank /dev/sdb1
$ sudo zfs create tank/data
$ sudo zfs snapshot tank/data@backup-2025-10-06
ZFS features:
- Copy-on-Write like btrfs
- Integrated volume management (no LVM required)
- Automatic data repair with redundant storage
- Compression and deduplication
- Snapshots and clones
Because of licensing restrictions, ZFS is not integrated into the Linux kernel. Distributions provide separate ZFS modules (Debian: zfs-dkms, Arch: zfs-linux). OpenBSD and FreeBSD include native ZFS support.
XFS — Performance-Oriented
The XFS filesystem is optimized for large files and parallel I/O. It is particularly efficient for video editing, databases, and server workloads with many simultaneous write operations.
$ sudo mkfs.xfs /dev/sdb1
meta-data=/dev/sdb1              isize=512    agcount=4, agsize=65536 blks
data     =                       bsize=4096   blocks=262144, imaxpct=25
naming   =version 2              bsize=4096   ascii-ci=0, ftype=1
log      =internal log           bsize=4096   blocks=2560, version=2
XFS characteristics:
- Excellent performance with large files
- Optimized for parallel I/O
- Online defragmentation
- Journaling for crash recovery
- Cannot be shrunk (only expanded)
Filesystem Comparison
| Filesystem | Snapshots | RAID | Compression | Max File Size | Special Feature |
|---|---|---|---|---|---|
| ext4 | No | No (mdadm required) |
No | 16 TB | Stable, standard |
| btrfs | Yes (CoW) | Yes (built-in) | Yes (zstd) |
16 EB | Modern features |
| ZFS | Yes (CoW) | Yes (built-in) | Yes (lz4) |
16 EB | Data integrity |
| XFS | No | No (mdadm required) |
No | 8 EB | Performance |
The right choice depends on the workload. Servers with critical data benefit from ZFS or btrfs (snapshots, checksums). Desktop systems work extremely well with ext4 (simple and proven). Performance-critical workloads often favor XFS.
Network Filesystems
NFS — Network File System
NFS allows access to remote directories over the network. The server exports directories, and clients mount them as though they were local.
$ sudo mount -t nfs server.local:/export/share /mnt/nfs
$ df -h /mnt/nfs
Filesystem                      Size  Used Avail Use% Mounted on
server.local:/export/share      500G  123G  377G  25% /mnt/nfs
The -t nfs option specifies the filesystem type. server.local:/export/share is the remote path (server and exported directory). After mounting, the remote files appear locally under /mnt/nfs.
$ cat /etc/fstab
server.local:/export/share  /mnt/nfs  nfs  defaults,_netdev  0  0
The _netdev option delays mounting until the network is available. Without this option, the system could hang during boot if the NFS server is unreachable.
SMB/CIFS — Windows Shares
SMB (Server Message Block) is the Windows network protocol, implemented on Linux as CIFS (Common Internet File System):
$ sudo mount -t cifs //windows-server/share /mnt/windows -o username=michael,password=secret
This mounts a Windows share. The -o username=michael,password=secret option authenticates access. A credentials file using credentials=/path/to/file is more secure than placing the password on the command line.
$ cat /etc/fstab
//windows-server/share  /mnt/windows  cifs  credentials=/root/.smbcredentials,_netdev  0  0
The credentials file contains the username and password:
$ cat /root/.smbcredentials
username=michael
password=secret
The file should have 600 permissions (readable only by root)—passwords stored in world-readable files represent a security risk.
SSHFS — Filesystems over SSH
SSHFS (SSH Filesystem) uses SSH for filesystem access. Any SSH server automatically becomes a file server:
$ sshfs michael@remote-server:/home/michael/data /mnt/sshfs
$ ls /mnt/sshfs
documents  projects  backup
SSHFS uses existing SSH connections and requires no additional server configuration. SSH keys enable passwordless mounting. Performance is lower than NFS, but SSHFS works across the Internet, whereas NFS is typically used on local networks.
$ fusermount -u /mnt/sshfs
fusermount -u unmounts FUSE-based filesystems (SSHFS, NTFS-3G, etc.). FUSE runs in userspace rather than the kernel, allowing ordinary users to unmount their own FUSE mounts. Regular umount requires root privileges, whereas fusermount lets users unmount their own FUSE filesystems without sudo.
Practical Mount Scenarios
Manually Mounting a USB Drive
$ sudo fdisk -l
Disk /dev/sdc: 32 GB
Device     Boot Start      End  Sectors Size Type
/dev/sdc1        2048 62914559 62912512  30G Microsoft basic data

$ sudo mkdir -p /mnt/usb
$ sudo mount /dev/sdc1 /mnt/usb
$ ls /mnt/usb
documents  pictures  music
fdisk -l displays all storage devices. The USB drive is /dev/sdc1. After mounting it at /mnt/usb, its files become accessible. The -p option for mkdir creates any missing parent directories.
$ sudo umount /mnt/usb
Unmounting the USB drive before unplugging it writes buffered data to the device. Without unmounting, recent changes may be lost.
Mounting an ISO Image as a Loop Device
$ sudo mount -o loop debian.iso /mnt/iso
$ ls /mnt/iso
boot  dists  doc  firmware  install  isolinux  pics  pool
The -o loop option automatically uses a loop device. The ISO image appears as a mounted filesystem. This is useful for inspecting ISO images or performing installations without burning a CD or DVD.
Organizing Multiple Partitions
$ cat /etc/fstab
UUID=...  /              ext4   defaults              0  1
UUID=...  /home          ext4   defaults              0  2
UUID=...  /var           ext4   defaults              0  2
UUID=...  /var/log       ext4   defaults,nodev        0  2
UUID=...  /tmp           ext4   defaults,nosuid,nodev 0  2
UUID=...  /srv           ext4   defaults              0  2
Separate partitions for /home, /var, /var/log, /tmp, and /srv isolate data. A full /var/log partition does not affect /home. The nodev and nosuid options improve security—/var/log does not require device files, and /tmp does not require SetUID programs.
Mounting an mdadm RAID Array
$ sudo mdadm --detail /dev/md0
/dev/md0:
        Version : 1.2
  Creation Time : Mon Jan 15 10:30:00 2024
     Raid Level : raid1
     Array Size : 976630464 (931.39 GiB)
  Used Dev Size : 976630464 (931.39 GiB)
   Raid Devices : 2
  Total Devices : 2

    Number   Major   Minor   RaidDevice State
       0       8        1        0      active sync   /dev/sda1
       1       8       17        1      active sync   /dev/sdb1

$ sudo mount /dev/md0 /mnt/raid
The RAID array /dev/md0 consists of /dev/sda1 and /dev/sdb1 in a RAID 1 mirror. After mounting it at /mnt/raid, the data becomes available. The RAID layer is transparent—the filesystem sees only a single block device.
Troubleshooting Common Mount Problems
Device Is Busy
$ sudo umount /mnt
umount: /mnt: target is busy.
Unmounting fails because processes are still accessing the filesystem. The lsof command (list open files) shows which ones:
$ sudo lsof /mnt
COMMAND   PID    USER   FD   TYPE DEVICE SIZE/OFF NODE NAME
bash     1234 michael  cwd    DIR  8,17     4096    2 /mnt
Process 1234 (a Bash shell) has /mnt as its current working directory. Changing to another directory resolves the problem:
$ cd /home
$ sudo umount /mnt
Read-Only Remount After Errors
$ dmesg | tail
[12345.678] EXT4-fs error (device sda1): ext4_lookup:1234: inode #12345: comm cat: bad extra_isize 512 (inode size 256)
[12345.679] EXT4-fs (sda1): Remounting filesystem read-only
Serious filesystem errors cause an automatic read-only remount. Write operations are blocked, while reads continue to work. This protects against further data loss caused by failed write attempts.
$ sudo fsck -y /dev/sda1
fsck from util-linux 2.38.1
e2fsck 1.47.0 (5-Feb-2023)
/dev/sda1: clean, 245678/1234567 files, 3456789/4567890 blocks
Unmounting the filesystem and running fsck repairs it. The -y option automatically answers “yes” to all prompts. After a successful repair, the filesystem can be mounted normally again.
Permission Denied When Mounting
$ mount /dev/sdb1 /mnt
mount: only root can do that
Only root is allowed to mount filesystems as a security feature. sudo is required:
$ sudo mount /dev/sdb1 /mnt
Alternatively, the user option in /etc/fstab allows ordinary users to mount the filesystem:
/dev/sdb1 /mnt/usb ext4 user,noauto 0 0
With this fstab entry, any user can run mount /mnt/usb without sudo. The noauto option prevents automatic mounting during boot, making it suitable for removable storage devices.
Summary
The mount concept separates the directory tree (logical) from storage devices (physical). Separate partitions for /home, /var, and /tmp isolate data and prevent system-wide failures when individual partitions become full. tmpfs uses RAM for temporary files, providing high performance at the cost of persistence.
/etc/fstab defines permanent mounts using UUIDs or labels for hardware-independent configuration. Mount options such as ro, noexec, and nosuid improve security on external storage devices. Different filesystems (ext4, btrfs, ZFS, and XFS) each have specific strengths, and the appropriate choice depends on the workload.
This series has explained the fundamentals of Unix filesystems: directory hierarchy, permissions, links, and mounting. With this foundation, the distribution-specific articles in the operating system fundamentals series become much easier to understand.
Software and Versions Used
This discussion is based on:
- Mount system: Standard since Unix Version 7 (1979)
- Filesystems: ext4 (standard), btrfs, ZFS, XFS
- Operating systems: All Linux distributions and BSD systems
- Context: Universal across all Unix-like operating systems
- Current as of: October 2025
Next steps:
- Debian Fundamentals (planned)
- OpenBSD Fundamentals (planned)
- Network Fundamentals →